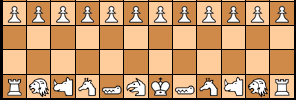
Cut-Out Symbolic Shogi Pieces
The following images are for making your own Shogi pieces. Click on the thumbnail to view and print the full image.
 |
 |
 |
These pieces were drawn and designed by Fergus Duniho. They are based mainly on my abstract Chess piece designs and the alchemical symbols for gold and silver. You have the option of making pieces out of color images or out of black and white images.
Instructions
- Print the Images
- Cut Out the Images
- Trace the Outline of the Images
- Cut Out Pieces
- Apply Images to Pieces
Step One: Print the Images
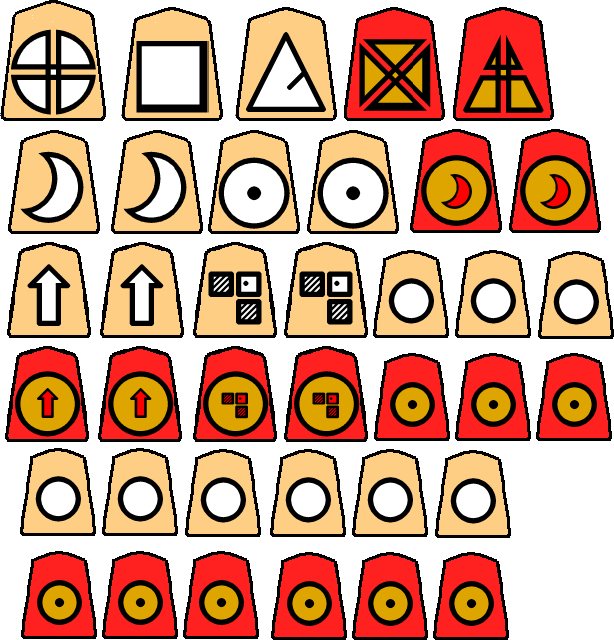
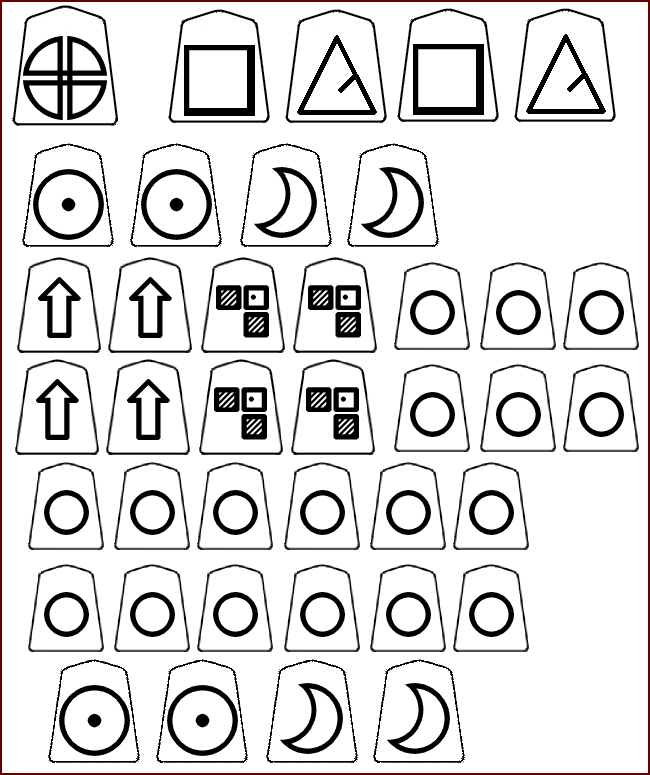
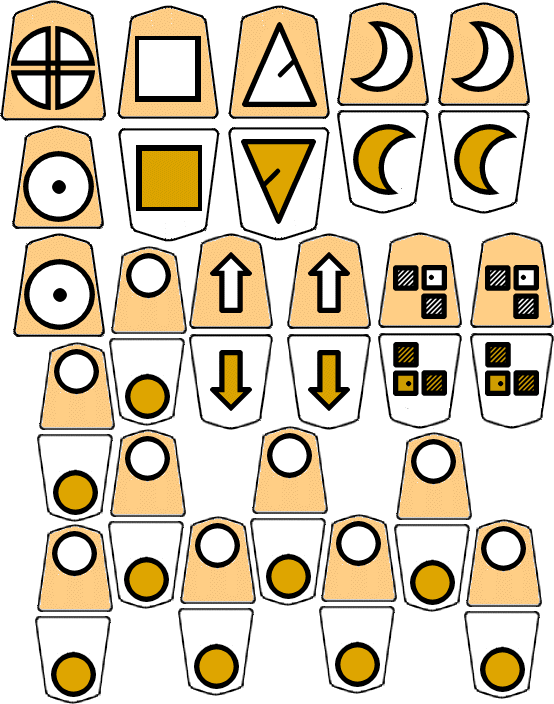
First, choose whether you will print in color or in black and white. If you print in color, print the color image twice. This image contains all the pieces for one side in Shogi. If you print in black and white, print each black and white image once. One contains all the unpromoted pieces for one side, and the other contains all the promoted pieces for one side. The black and white pieces are separated like this to give you the option of printing each on different color paper.
Another option is to print the black and white unpromoted pieces twice, but on different colors of paper. If you did this, you would use color alone to distinguish between promoted and unpromoted pieces.
To get the largest pieces you can get, stretch the image to fit the page you're printing on. There is a border around the black and white pieces to guarantee that they will print out the same size if you stretch each image to fit the page. Your web browser will not do this for you. To do this, save the image, then load it into a graphics program.
My recommendation is to print the color pieces. You don't have to be limited to your own printer. Take the file to a copy center, and have them color laser print the color image for you. While you're there, you can also get it printed on uncut sticker paper. This is what I did. For a few dollars, I got color laser printed stickers that I could make pieces with.
Step 2: Cut out the Images
Using scissors, cut out the piece images you printed. Cut along the outside of each piece's border. If you have printed them out on sticker paper, do not unpeel them yet.
Step 3: Trace the Outline of the Images
For each unpromoted piece, use a pencil to trace its outline on foamboard, corrugated cardboard, or posterboard. I recommend foamboard, because it will give you thicker pieces than posterboard or cardboard will. You can buy foamboard at your local crafts shop. The downside of using foamboard is mainly in the effort it will take to make the pieces, not in the finished product. Corrugated cardboard may be a good compromise between foamboard and posterboard. It's almost as thick as foamboard, and it's a lot easier to cut.
Step 4: Cut Out Pieces
After you've traced the shape of a piece, cut it out. With posterboard or cardboard, this is easily done with scissors. Foamboard can also be cut with strong scissors, but scissors can damage foamboard while cutting it. To do less damage while cutting, use craft knives and a cutting board. First, place the foamboard on your cutting board. With a pen knife, lightly cut a groove along the outline you traced. Still using the pen knife, make the groove a bit deeper. Then, using a utility knife, which has a bigger blade, cut more deeply into the groove. Push it out enough so that the outline of the piece can be seen from the other side of the foamboard. Gently cut through this with the pen knife. Pop the piece out.
Step 5: Apply Images to Pieces
If you have printed the images on sticker paper, unpeel a sticker for an unpromoted piece and carefully place it on the piece you cut out for it. Align the bottom of the sticker with the bottom of the piece, and it should align properly. Except for the King and Gold Generals, which do not promote, unpeel the sticker for its promoted counterpart, and place that sticker on the other side of the piece.
Since the sticker and its backing will be evenly aligned, these stickers will be harder to peel than ready-made stickers. If you try peeling them with your fingernails, you may damage the sticker. But I have learned a trick for easily peeling scissor-cut stickers without doing any damage to them. Place the sticker face down on some foamboard. Gently pry between the sticker and its backing with the blade of a pen knife. Once you've separated them a bit with the pen knife, peel the sticker off.
If you have not printed out stickers, you should glue the images onto the pieces. I recommend using stick glue for this. Rub the stick glue over the surface of the piece, then place the image on it.
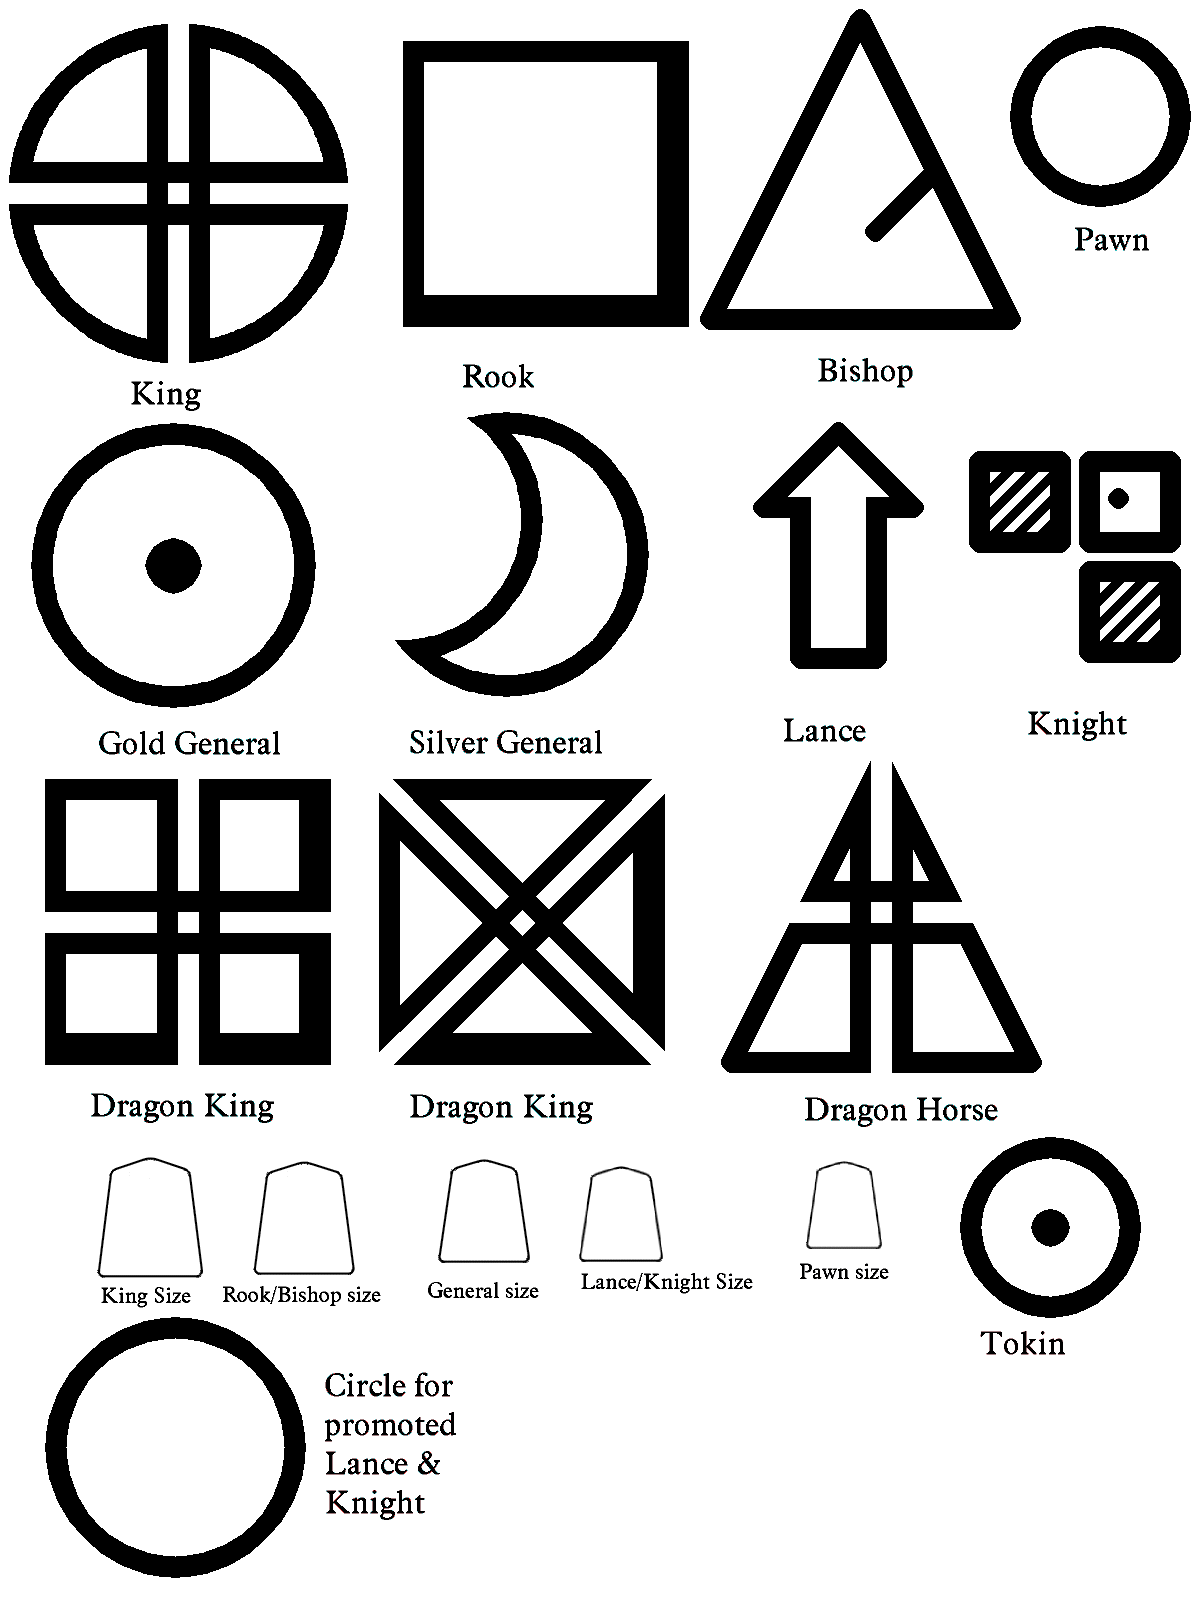
Legend
In case it isn't immediately obvious what each piece is, here is a legend of the pieces.
- King
- The King is represented by a cross in the form of a celtic knot. It does not promote.
- Rook
- The Rook is represented by a square. The square shape suggests the orthogonal movement of a Rook. The Rook promotes to a Dragon King, which is represented by a cross of four triangles connected in the center. This is basically a square with two diagonal lines cut through its center.
- Bishop
- The Bishop is represented by a triangle. The triangle shape suggests the diagonal movement of a Bishop. It also bears a resemblance to the Staunton Bishop. The Bishop promotes to a Dragon Horse. This is represented by a triangle split in four by a horizontal and a vertical line, with the four parts connected in the middle.
- Gold General
- The Gold General is represented by a circle with a dot in the center. This is the symbol for gold used in alchemy. Alchemy borrowed its symbols from astrology, and it represented gold with the astrological symbol for the sun. The Gold General does not promote.
- Silver General
- The Silver General is represented by a crescent moon, which is the alchemical symbol for silver. Alchemy borrowed the symbol of the moon from astrology. The promoted Silver General is represented by a smaller crescent moon inside of a circle.
- Lance
- The Lance is represented by a forward pointing arrow, shaped like the arrow on a one way sign, because the Lance can move only one way. The promoted Lance is represented by a smaller arrow inside of a circle.
- Knight
- The Knight is represented by three Chess squares arranged in the shape of a horse's head. Besides resembling a horse, it is a representation of how a Knight moves. The promoted Knight is represented by a smaller horse head inside of a circle.
- Pawn
- The Pawn is represented by an empty circle. The Pawn promotes to a Tokin, which is represented by the alchemical symbol for gold.
- Color Promoted pieces
- Promoted pieces are gold, because most move as Gold Generals, on a red background. The other pieces are unpromoted.
More Options
Before I put together this set, I had designed and uploaded a similar set. If you like it better, you may choose to use it instead of the one now featured on this page.
If you would like to use the pieces of the featured set, but would like to color the pieces differently, you should download the patterns I used, then use those patterns to put together a differently colored set. Trying to recolor the black and white pieces won't work out well, because they are reduced and anti-aliased versions of larger images. This was done to get smoother curves and diagonals. To use the patterns, recolor the patterns, then halve their size twice with anti-aliasing turned on. Ultimate Paint is a freeware program that can do this for you. Lance, Knight, and Silver General images should be halved in size three times for promoted pieces. The Shogi piece outlines are already to scale.
Copyright
This set is copyright (c) 2000 by Fergus Duniho. Commercial use is prohibited without the express permission of Fergus Duniho. Inquiries concerning commercial use are welcome.
Written by Fergus Duniho
WWW Page Created: 26 August 2000; Last modified 2 September 2000.