An "EconoSplurge" Chess Variant Set
Ron Hale-Evans
Introduction
I wanted to make my own chess variant construction set like the ones on the Chess Variant Pages. I wanted to be able to make almost any kind of CV board, and I wanted a set of matching pieces like those on Jean-Louis Cazaux's site. I had a relatively limited budget, but I wanted some high-quality pieces, so I decided to economise on the board and splurge on the pieces, hence the name of the set. The whole set has so far cost me less than $200 plus some time and effort, of which $175 was spent on pieces and only $20 was spent on the board. Of course, you can always economise on your pieces as well, and make an EconoEcono set.
Making the Board
If I had bought a bunch of floppyboards and cut them up to make the board construction set described below, it would have cost at least $100, and I would have been limited to a few colours: maybe buff, green, and brown. I wanted to be able to play exotic variants with my set, such as Dragonchess, with its blue/white. green/amber, and red/brown boards. Vinyl boards offer more colours, including red, but cost would still have been prohibitive. In the end, at my wife's suggestion, I settled on coloured felt as a material. I was able to obtain at least a square yard of felt in nine different colours for about $20 US from my local craft store (top to bottom in the photo below: white, brown, green, gold, red, dark blue, sky blue, black, buff). If I hadn't wanted so many colours, I probably could have gotten away with $5-10 worth of felt. As it is, $20 bought me more fabric than I will probably use.
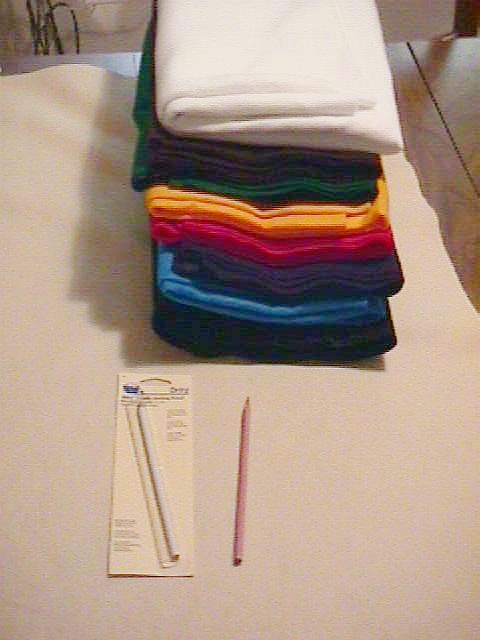
Fig. 1: The materials for the board.
(click to enlarge)
Rather than gluing together segments as large as 4x4, as Fergus Duniho and others have cut out of floppyboards, I decided I would cut out individual 2-by-2-inch squares of felt and place them on a backing piece. Felt sticks to itself pretty well, so no glue is needed. Setting up large boards takes a little longer, but having individual squares means infinite configurability -- I'm able to set up just about any board made of squares. (I may cut some hexagons out of the felt later.)
There's not much to cutting out the squares. Simple, common-sense instructions follow.
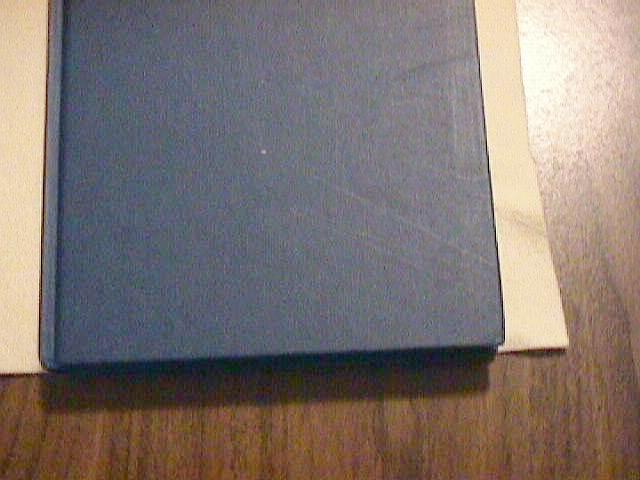

Fig. 2: Squaring the edge with a book.
Fig. 3: The line drawn with the book.
(click to enlarge)
First, lay the felt so the selvaged edge is facing you. The selvaged edge is the factory-made edge, as opposed to the side the salesperson cut for you. The selvaged edge is usually straight, whereas the side the salesperson cut can be quite uneven.
Next, you want to create a line at a good 90-degree angle from the selvaged edge. If you have a T-square, use it; otherwise, a hardcover book in good condition will do. (I used the Encyclopedia of Chess Variants.) Lay the book so that one edge is exactly parallel to the selvaged edge and the perpendicular edge of the book is close to the perpendicular edge of the felt (Fig. 2). Then take a pencil with a soft lead in a contrasting colour and draw a line along the perpendicular edge of the book (Fig. 3). (I bought a fabric pencil from the craft store, but ending up using ordinary coloured pencils most of the time; the fabric pencil was soft, wore down quickly, and couldn't be sharpened easily.)
Next, take a yardstick and carefully extend the line you have drawn. Call this Line 1. How far you should extend it depends on how many squares you want to make. Initially, I decided to make at least 72 squares in three different colours, so that I could make two-colour boards at least 12x12 (144 squares) in size; thus, I decided to draw a grid of 80 squares, with 8 squares on one side and 10 on the other. Make sure to draw some extra squares; you will make mistakes when you cut them out.
Now you have a piece of felt with two perpendicular "sides": one is the selvaged edge, and the other is Line 1. Start at the intersection of these lines and make a pencil mark every two inches along each edge (adjust to taste if you want larger or smaller squares).
Now you need two more guide lines so you can start drawing your grid. First, take the book and draw a line parallel to Line 1, starting from the mark on the selvaged edge that is the farthest from Line 1. Extend this new line as before with the yardstick. Call this Line 2. Make marks every two inches on it, starting from the bottom. Then connect the top mark on Line 2 with the top mark on Line 1 (they should be at the same height) using the pencil and the yardstick. Call this Line 3, and make marks every two inches along it, corresponding to the marks along the selvaged edge.
Finally, connect the corresponding marks on Lines 1 and 2, as well as the corresponding marks on Line 3 and the selvaged edge, using your pencil and yardstick. You will end up with a grid that looks like a piece of graph paper. Cut along the lines with nice, sharp scissors, and you will have a bunch of two-inch squares of felt. Repeat for multiple colours of felt, and you will have a few piles of squares that look like Figure 4.


Fig. 4: Piles of completed felt squares.
Fig. 5: The squares set up for Rococo, against black felt.
(click to enlarge)
Your squares may not come out perfectly square if you're a klutz like me, but if you lay them against a darker piece of felt, they'll still look pretty nice (Fig. 5). The large piece of felt will also keep the small pieces from slipping around. For my backdrop, I cut out a piece of black felt about a yard square. The nice thing is that I can set up a "quick and dirty" two-colour board if I'm in a hurry by placing only the light squares, using the black backdrop itself for the dark squares.
Pieces
So much for the Econo; now for the Splurge.
My pieces so far consist of Exchess Sets 1+C and 2 from the Super Chess site. Exchess Set 1 is a set of 16 fairy pieces (eight black and eight white) of six different types. Set 1+C is all of the Set 1 pieces, plus 32 Staunton-style ortho-Chess pieces. Exchess Set 2 is a similar set of 32 fairy pieces (16 black and 16 white), of 12 types, mostly different from Exchess Set 1. They are quite handsome: weighted and felted hardwood pieces, with a King height of about five inches. Each set (1+C and 2) comes in a heavy hardwood box with a vertical divider. I now use one box for each colour, with the 16 orthodox pieces fitting easily in one compartment, and the 24 fairy pieces just fitting in the other. If you go this route, be careful; my Exchess Set 1+C box came with a warning that the Princess and Minister pieces were fragile, but the only damage any of my pieces seemed to have sustained on its journey from the Netherlands to the US is a small chip out of the white mobilisation pawn (Exchess Set 2).
All three sets together (1, 2, and C) cost me about $175 US, including $20 shipping for a very heavy package (you save on shipping if you multiple sets at the same time). I was not disappointed. The pieces are even more attractive than I expected, and they are certainly larger. As my friend John, a retired Chess master, remarked, although the Exchess pieces are quite tall, they tend to be slender, and their bases are not too wide for a two-inch square (most vinyl boards and floppyboards seem to have 2.25-inch squares). John noted, however, that they might be inclined (excuse the pun) to topple over in a speed game.
The next two photos show the Econo board and a subset of the Splurge pieces set up for a game of Rococo.
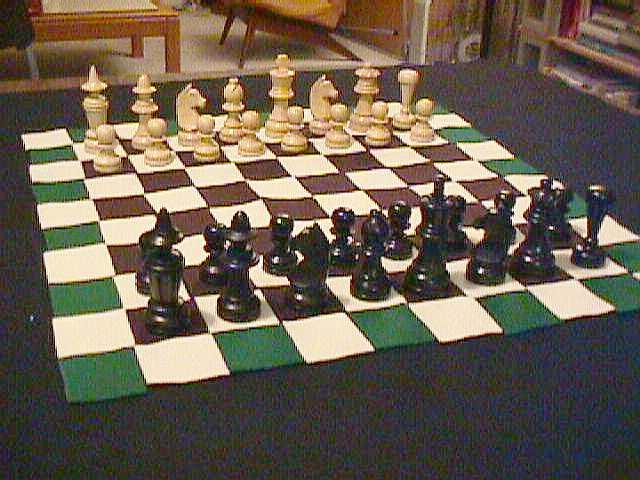

Fig. 6: The Rococo array.
Fig. 7: The Rococo white pieces.
(click to enlarge)
| ROCOCO PIECE | OMEGA CHESS PIECE | EXCHESS PIECE |
| Advancer | Champion | Veteran (note 1) |
| Cannon Pawn | Pawn | Pawn |
| Chameleon | Queen | Bishop (note 2) |
| Immobiliser | Rook | Parachutist (note 3) |
| King | King | King |
| Long Leaper | Knight | Knight |
| Swapper | Wizard | Magician (note 1) |
| Withdrawer | Bishop | Queen (note 2) |
Note 1: The Veteran and the Magician are the closest pieces in my Exchess set to the Omega Chess set's Champion and Wizard, respectively.
Note 2: We used the Bishop for the Chameleon,and the Queen for the Withdrawer, instead of the reverse (as Aronson and Howe recommend), because ours are the standard Ultima substitutions, and we play Ultima a lot. If you play more Rococo than Ultima, and sometimes substitute two Pushme-Pullyus for the Advancer and Withdrawer, it might make more sense to do it the other way around. However, if we play this variant, we will probably keep the Bishop as the Chameleon, and use two Exchess Rapid Pawns for the Pushme-Pullyus.
Note 3: We used a Parachutist instead of a Rook for the Immobiliser because we usually use it instead of an inverted Rook for the Immobiliser in Ultima. Mnemonically, it looks like a baseball bat, so we think of it as a piece that bludgeons the pieces around it into immobility.
Here are some photos of these Exchess pieces, from the perspective of White:
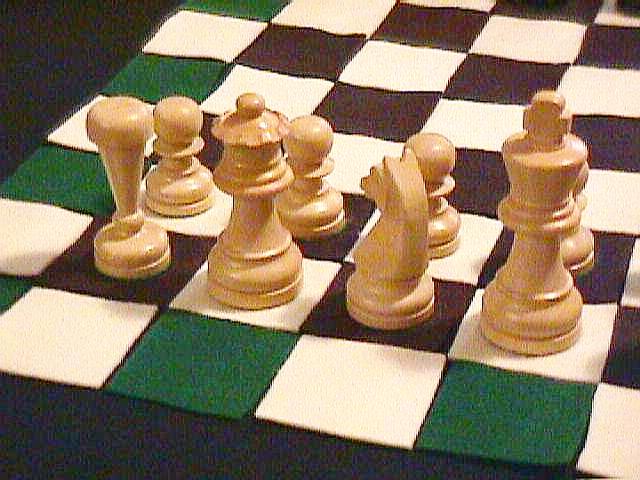
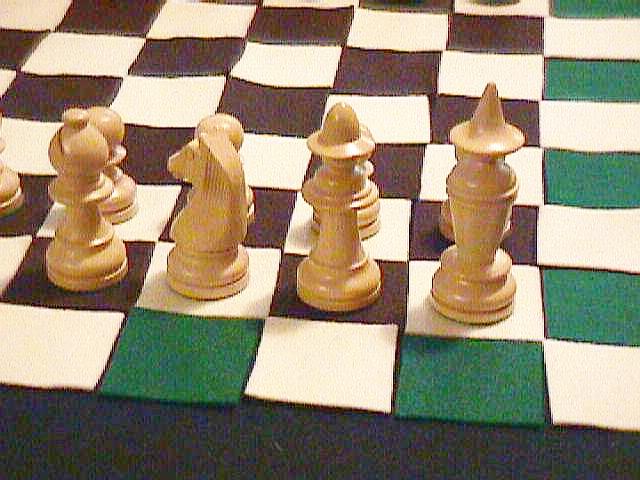
Fig. 8: Left to right: Immobiliser (Parachutist), Withdrawer (Queen), Long Leaper (Knight), King (King).
Fig. 9: Left to right: Chameleon (Bishop), Long Leaper (Knight), Advancer (Veteran), Swapper (Magician).
(click to enlarge)
The Set in Action
So how does an EconoSplurge set play?
Pretty well. The 100-square board did did take a few minutes to set up, but I did it while listening to a radio program, and it wasn't too bothersome. I could have cut my setup time almost in half if I used the black background for the dark squares instead of placing brown squares, but I wanted some pretty photos. The black cloth folds up nicely, by the way.
The buff squares still show some light pink pencil marks on their undersides, so I have to be careful which of their sides I place up. This may not be a problem for you if you're better at cutting them out than I am, or if you use a lighter pencil.
The Exchess pieces have a nice feel in your hand, and the felt squares don't slip around as long as you have a felt cloth underneath them. We did find that the felted bases of the Exchess pieces would occasionally stick to the felt squares and lift them up with the piece. This is exacerbated by the fact that I am presently using the cotton batting that came as packing material to cushion the Exchess pieces in their boxes; if any of that sticks to the felted base of a piece, it makes the base even stickier. However, I am going to replace the cotton in the boxes with something else soon, and as the felted bases on my new pieces are used on a variety of other surfaces (such as a polished ortho-Chess board), the bases will become smoother and less sticky.

Fig. 10: My wife moves her Long Leaper behind my pieces, ready to chew up my back rank.
(click to enlarge)
Fig. 10 is a photo of a Rococo game between me and my wife. I was not used to playing with the empty back rank, and let her jump one of my Long Leapers with her own. Now her Long Leaper is in my back rank, from which it will wreak havoc for the rest of our (short) game. The Long Leaper is powerful enough in Ultima; we found that in Rococo, it's a monster.
I hope this page has inspired you to make some interesting strategic and tactical discoveries with your own EconoSplurge set.
Acknowledgements
Thanks to Jean-Louis Cazaux, Fergus Duniho, David Howe, and Tony Quintanilla for inspiring me to create my own CV construction set. Thanks to the editors of the Chess Variant Pages for posting this article. Thanks to H. van Haeringen for his beautiful Exchess pieces. Thanks to Bob Abbott for the creation of Ultima, currently my favourite chess variant -- even if it isn't his! -- and to Peter Aronson and David Howe for creating their Ultima variant Rococo.
Most of all, thanks to my wife Marty Hale-Evans, for both tolerating my splurges and helping me economise by suggesting a felt board. Thanks to her also for advice on how to work with fabric and other materials, for editing this article, and for being a great game opponent and my all-around favourite person.
Contact
WWW page and photos by Ron Hale-Evans.
WWW page created: November 24, 2002. Last updated: Feb. 1, 2006.