Chess Variant Set Construction
Overview
Introduction
The idea of making my own Chess Variant Set was inspired by Fergus Duniho's Chess Variant Construction Set and David Howe's Floppy Board Tiles and Chess Piece Discs, all very nice set construction ideas you can find on the Chess Variants site.
I got to thinking about the board first. David's tile idea for boards seemed very practical, because of its versatility. I have often admired the beautiful quality of ceramic tile and remembered seeing many tiles that were about the size of Chess board squares. I got to thinking that it should be possible to use ceramic tiles to create Chess variant boards.
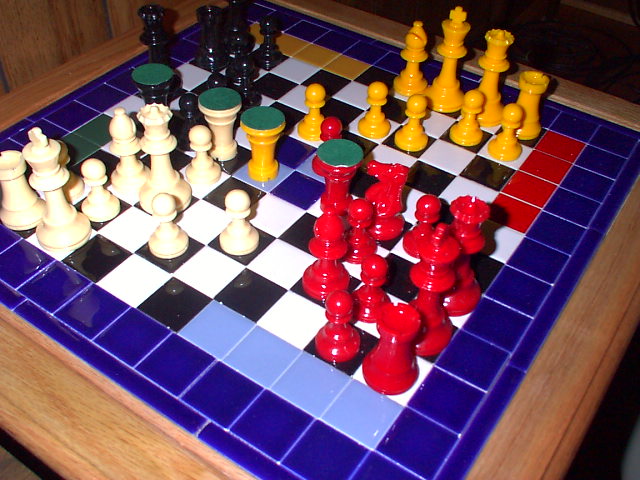
I tried this idea and came up with a set. This page describes how I made my set. Here's the final product to give you an idea, showing a game of Peter Aronson's Chaturanga 4-84 in play:
Components
Obviously, any Chess set consists of both a board and pieces. As Fergus Duniho suggests, the pieces can be taken from readily available commercial Chess sets, especially sets for Chess variants.
In the image above, the Chess pieces were taken from a set of Chessapeak Tourney, a commercial four-player Chess variant, with very nice pieces. Coincidentally, the pieces use the same mold as the pieces used in Omega Chess.
Besides readily available pieces, you can also make your own, as suggested by David Howe.
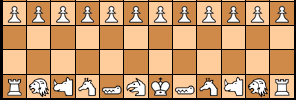
I also tried this. Here are pieces from my set:

Obviously, the other component of any Chess set is the board. Let me focus on this next and then go back to the pieces.
Ceramic Tile Boards
Ceramic tiles naturally lend themselves for use in Chess sets because they resemble the squares on the checker board. However, since tiles are normally loose, they must be placed in a frame to form a board. On the other hand, since they are loose, one can make any board pattern needed. I would not suggest grouting the tiles in because that would preclude changing the board pattern.
Board Frame
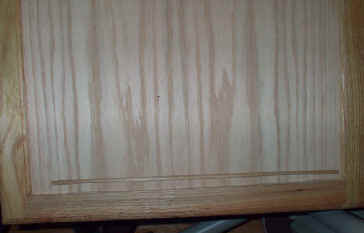
Here is a detail of the frame that I use. Actually, it is a standard wooden kitchen cabinet door I bought at a home supply store! This works well because it has a plywood back and a nice-looking wood frame. I varnished the frame and that made it look even better.

The frame holds the tiles in place. To illustrate this, I'll show how I assembled a board for my Takeover Chess.
Tiles
The tiles I used are commercially available 1-3/8 inch tiles (nominally 1 x 1 tiles). They are typically used to create mosaic and other designs. There are also larger 2-1/4 inch tiles (nominally 2 x 2 tiles) available. I did not use the larger tiles because I wanted to be able to create larger playing boards in a reasonable sized frame -- although the larger tiles would fit better with tournament size Chess pieces.
This gives you an idea of how I assembled the tiles. More on this below.

Assembling the Board
The kitchen cabinet door shown originally had outside dimensions of 22 x 21.5 inches and inside dimensions of 18 x 17.5 inches. Since the frame was not square, in order to fit the tile neatly, I trimmed one inside end. The final inside dimensions are now 17.75 x 17.75 inches. This work well. This image shows how I trimmed the frame.
To lay out a board, first I place edge tiles around the edge. For edge tiles, I used decorative strips, nominally 1 x 6 inches. I do this because the 1 x 1 tiles fit the frame better with this edge.

I can then easily fit a 12-tile by 12-tile pattern inside this frame; like this:

Then I go about filling the frame with the tiles in whatever board pattern I want. In this case, I am laying out the board for a game of Takeover Chess.

Here is the completed board. Note that the actual playing board is only the checker-patterned black and white tiles. The rest of the tiles simply frame the playing board. Since I like colors, I used three different colors of tiles, green, light blue and dark blue tiles, for the frame! The end product is quite nice.

Various Chess Variant Boards
In this way, a great many boards can be made. Here is a standard Chess board.

Here is a board for Glinski's Hexagonal Chess. Note that I did not use hexagonal tiles. Hexagonal tiles are available. I have seen both 1-inch and 2-inch tiles. However, I simply used staggered rows of square tiles because my frame fits square tiles well already. In order to offset the staggered rows, I cut some of the tiles in half using a simple manual tile cutting tool.

Pieces
As I mentioned above, I use both commercially available pieces and home-made pieces made from wooden cubes. I'll describe each of these.
Commercial Chess Pieces
The commercially available pieces I took from a set of Chessapeak Tourney and from a set of Omega Chess. Both of these sets use the same mold, so they coordinate well. Obviously, any standard Chess set or other commercial Chess variant sets can be used for pieces. Fergus has some good ideas about these.
One limitation is that standard "tournament"-size pieces, with a 3-3/4 inch King, fit on the 1-3/8 inch tiles a little tight. Tournament boards have 2-inch squares. Again, I could have used 2-1/4 inch tiles, but chose not in order to enable creating larger boards.
Chess Variant Sets with Commercial Pieces
Here is a photo of a standard Chess set assembled.

Here is a photo of a game set-up for Omega Chess, using a tile board and the Omega Chess pieces.

Here is an image of Glinski's Hexagonal Chess.

Here is a photo of Takeover Chess.

Finally, here is a game of Chaturanga 4-84. Notice that up-side-down Rooks are used for the Wazirs.

Home-made Wooden Cube Pieces
The only limitation is that a standard Chess set, or even the above Chess variant sets, provide a limited set of pieces. Depending on what Chess variants you intend to play, these may or may not be sufficient.
I use home-made wooden cubes to make piece sets for games that cannot be played with the above sets. David also has some nice ideas for home-made pieces.
Wood Cubes
I used two different size cubes, 1-inch cubes and 1-1/4 inch cubes. They each have their advantages and disadvantages. These cubes are available from many craft shops and craft supply vendors.
Here is a photo of Takeover Chess using 1-1/4 inch cubes. Notice that they barely fit in the 1-3/8 tiles. On the other hand, the images on them can be larger. This is useful for this set because I wanted to use the Isle of Lewis Chess set images for the pieces.

Images for the Wood Cubes
The images on the cubes were made by printing images I originally used for the Chess Variant Pages on plastic inkjet transparency sheets using a color inkjet printer. The images print very nicely.
Then I cut-out the images, used shellac to cover the cubes' surfaces and placed the cut-out piece images on the cubes. Since the images are printed on transparency sheets, the wood shows through.
The shellac works like an adhesive. Shellac also has the important advantage that it emits a lot less fumes than glue or varnish. Once dry, shellac is non-toxic. To protect the images on the cubes, I covered the images with a second coat of shellac. The shellac also improves the overall appearance of the wood.
Here is a close-up image.

Chess Variant Sets with Home-made Wooden Cube Pieces
Here is a picture of a standard Chess set. This set uses the smaller 1-inch cubes.

Here is a game of Peter Aronson's Thrones, in progress. Note that only the green and white tiles are part of the playing board. The rest of the tiles are meant to frame the playing board. This set uses the larger 1-1/4 inch cubes.

Here is a set for Chaturanga, the original game of Chess. This set uses the smaller 1- inch cubes.

With that, I will close. I hope these ideas are useful to you. You will find your own ways of constructing Chess sets. Please feel free to contact me by e-mail with any questions or ideas.
Written by Tony Quintanilla.
WWW page created: June 2, 2002.